Factories > Factory agents
Configuring factory agents
# Configuring factory agents Change how an existing factory agent works by editing its instructions, tools, and runtime in the <a href=https://platform.warp.dev>Warp Factories web app</a> or its definition files. ## Prerequisites * [Editor access to this factory, or team or workspace admin access](/factories/infrastructure-and-security/#factory-roles-and-permissions). * An existing factory agent. See [About factory agents](/factories/factory-agents/) for the default roles, or [Creating custom agents](/factories/factory-agents/creating-custom-agents/) to add a role. <span id="configure-agent-behavior" /> ## Edit agent settings and instructions For a Warp-managed factory, edit agent settings in the web app. For a GitHub-backed factory, settings are read-only in the web app; edit the [factory definition files](/factories/factory-as-code/) instead. See [Where the definition lives](/factories/factory-as-code/#where-the-definition-lives). 1. In the web app sidebar, click your factory to expand it, then click **Agents**. <figure style={{ maxWidth: "563px" }}>  <figcaption>The Agents page lists a factory's foreman and default agents.</figcaption> </figure> 2. Click an agent to open its **Settings** tab. <figure style={{ maxWidth: "563px" }}>  <figcaption>The Settings tab contains the agent's description and resources.</figcaption> </figure> 3. Edit the agent description, harness, model, runner, host, [MCP servers](/platform/mcp/), or [secrets](/platform/secrets/). 4. To change the agent's instructions, click **Prompt** and edit the prompt. 5. In the top-right corner, click **Save**. ## Choose models and harnesses per agent Choose each agent's model and harness in its settings. Supported harnesses include the Warp Agent, Claude Code, and Codex. A foreman using Claude Code or Codex can still dispatch other factory agents, whose runs are tracked as its children. Third-party harnesses require a paid plan. On the Free plan, agents use the Warp Agent. See [Warp pricing](https://www.warp.dev/pricing) for plan details. Default model IDs change over time, so choose based on what each agent has to do well: | Agent | What to optimize for | | --- | --- | | Foreman | Orchestration, instruction following, and long-running conversations | | Triage | Research, evidence gathering, and working with connected tools | | Spec | Synthesizing requirements, technical reasoning, and precise writing | | Implement | Coding strength, with a harness that fits your repositories and toolchain | | Review | A different model or harness from the implement agent, so the two don't share blind spots | The model picker also includes custom routers from factories you can access. See [Agent model choice](/agents/inference/model-choice/), [Custom routers](/agents/inference/custom-routers/), and [Harnesses in the Automation Platform](/platform/harnesses/) for available options. ### Configuring a third-party harness Change an agent's harness to Claude Code or Codex to run it with that provider's own coding tool. 1. In the web app sidebar, click your factory to expand it, then click **Agents**. 2. Click an agent to open its **Settings** tab. 3. In the "Harness" dropdown, choose **Claude Code** or **Codex**. The "Auth" field appears for these harnesses. 4. In the "Auth" field, choose a compatible, team-owned secret from the list or click **New auth secret** to create one. <figure style={{ maxWidth: "563px" }}>  <figcaption>The Auth dropdown appears when a third-party harness is selected.</figcaption> </figure> :::note * Claude Code accepts an Anthropic API key, Anthropic Bedrock API key, or Anthropic Bedrock access key. * Codex accepts an OpenAI API key. See [connecting Claude Code credentials](/platform/harnesses/authentication/#connecting-claude-code-credentials) and [connecting Codex credentials](/platform/harnesses/authentication/#connecting-codex-credentials) for how to obtain each key. ::: 5. In the "Model" dropdown, choose a model from that harness's catalog. 6. In the top-right corner, click **Save**. With a Warp-managed factory, you can edit harness, auth, and model from the dashboard. A GitHub-backed factory sets them through [`agentDefaults.harness` or a per-agent `harness` override](/factories/factory-as-code/#agentdefaultsharness) in the definition files. For an example, see [`03-multi-harness`](https://github.com/warpdotdev/warp-factory-examples/tree/main/examples/03-multi-harness). ## Related pages * [About factory agents](/factories/factory-agents/) - Understand responsibilities and human decision points * [Creating custom agents](/factories/factory-agents/creating-custom-agents/) * [Factory skills](/factories/factory-skills/) * [Definitions as code](/factories/factory-as-code/)Tell me about this feature: https://docs.warp.dev/factories/factory-agents/configuration/Configure a factory agent's instructions, tools, model, and harness, including authentication for Claude Code and Codex.
Change how an existing factory agent works by editing its instructions, tools, and runtime in the Warp Factories web app or its definition files.
Prerequisites
Section titled “Prerequisites”- Editor access to this factory, or team or workspace admin access.
- An existing factory agent. See About factory agents for the default roles, or Creating custom agents to add a role.
Edit agent settings and instructions
Section titled “Edit agent settings and instructions”For a Warp-managed factory, edit agent settings in the web app. For a GitHub-backed factory, settings are read-only in the web app; edit the factory definition files instead. See Where the definition lives.
-
In the web app sidebar, click your factory to expand it, then click Agents.
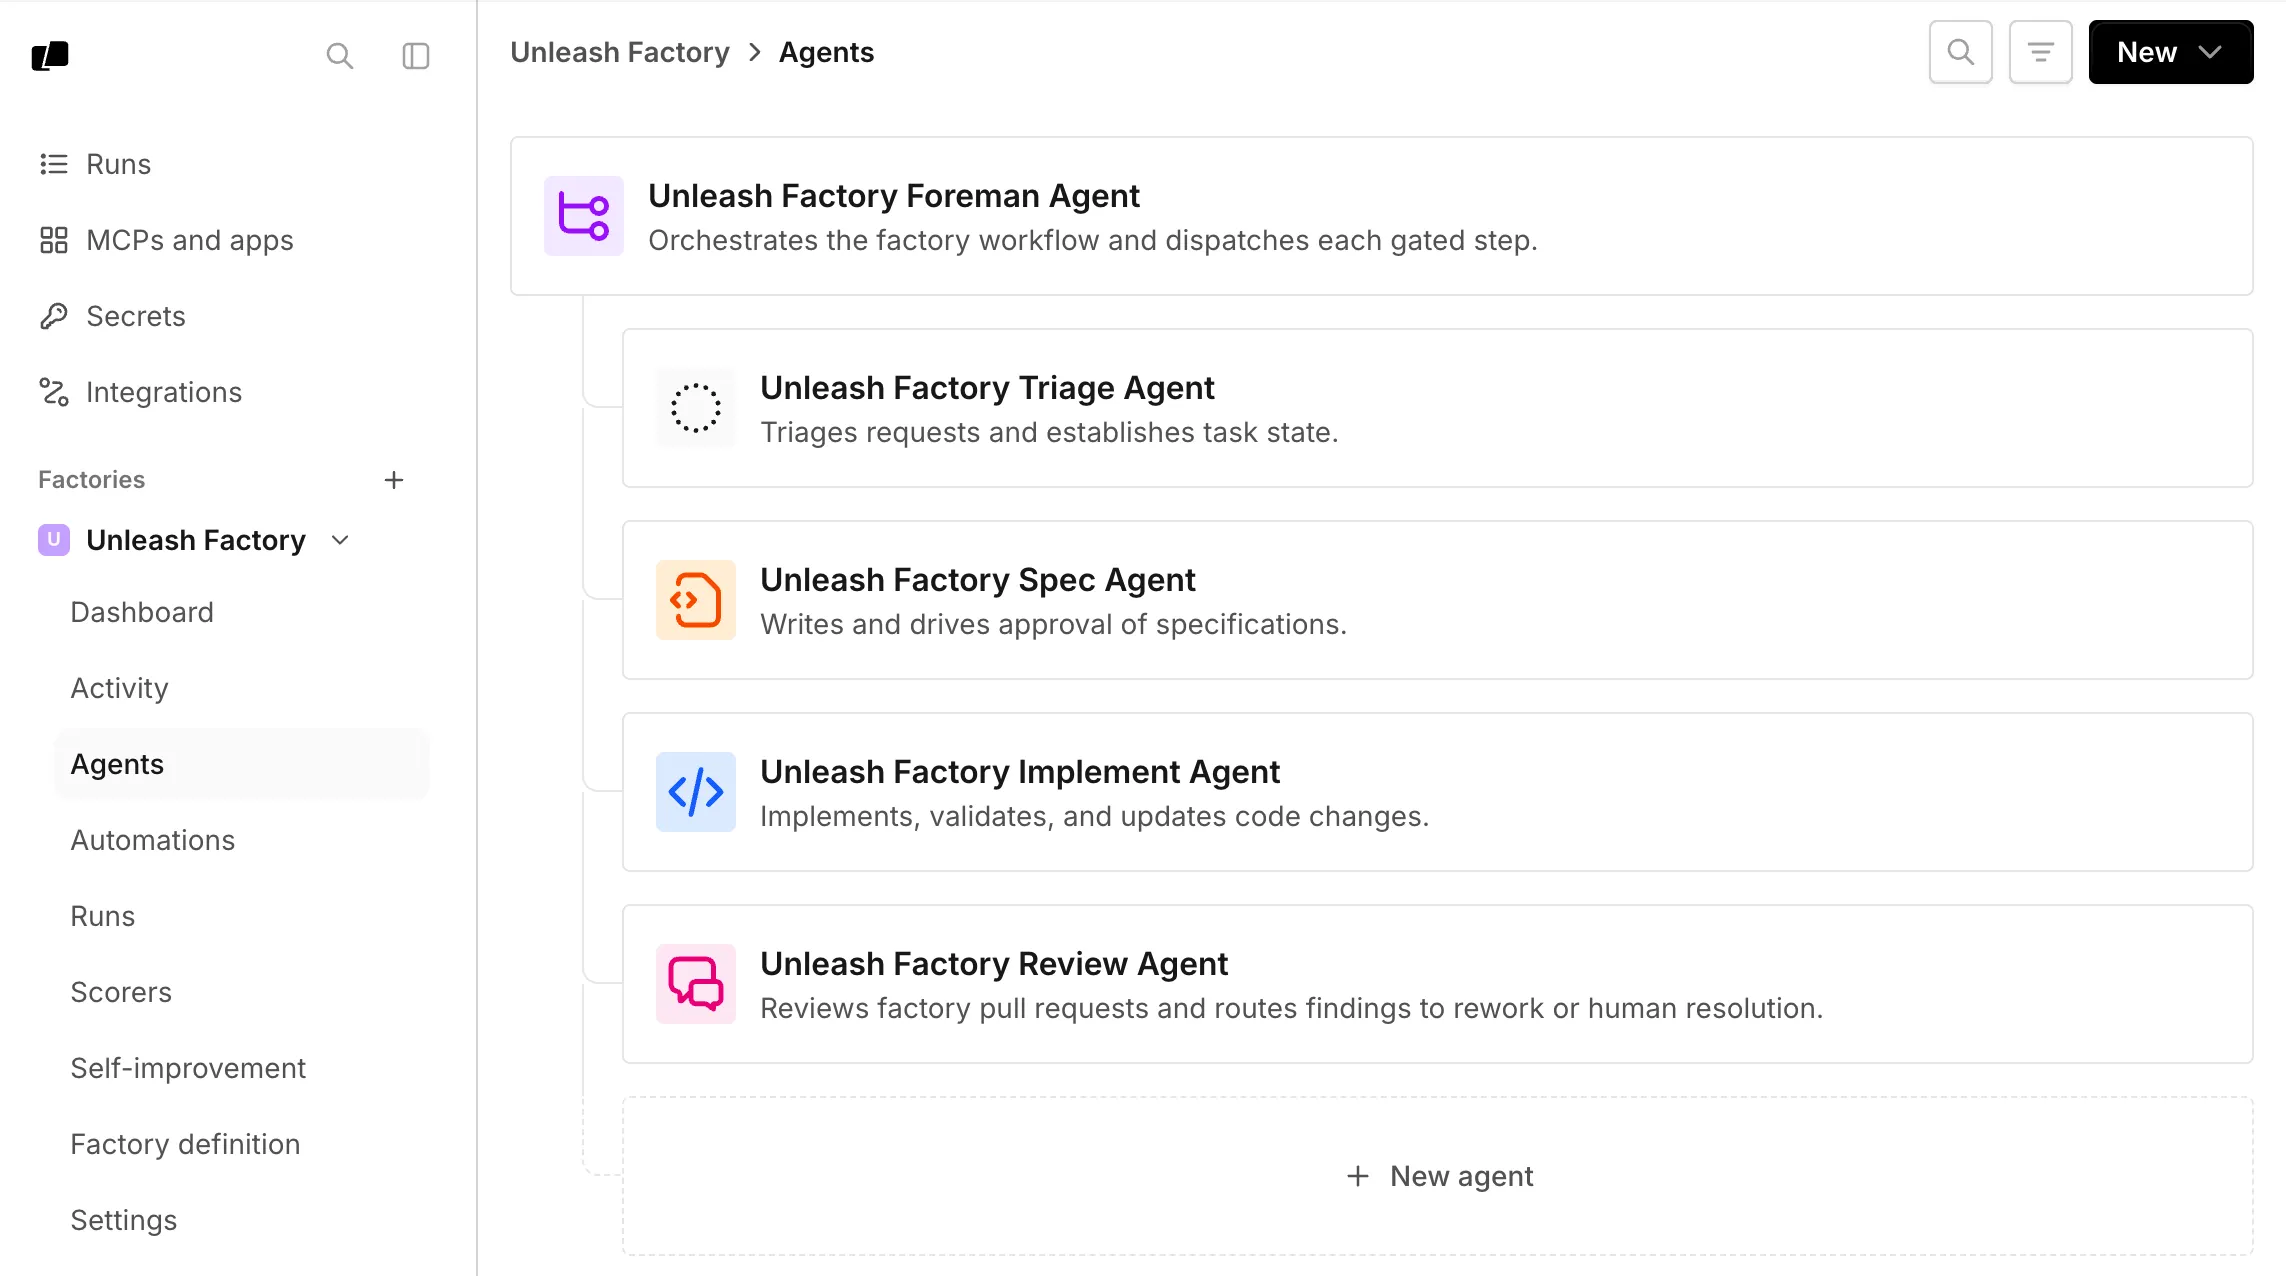
The Agents page lists a factory’s foreman and default agents. -
Click an agent to open its Settings tab.
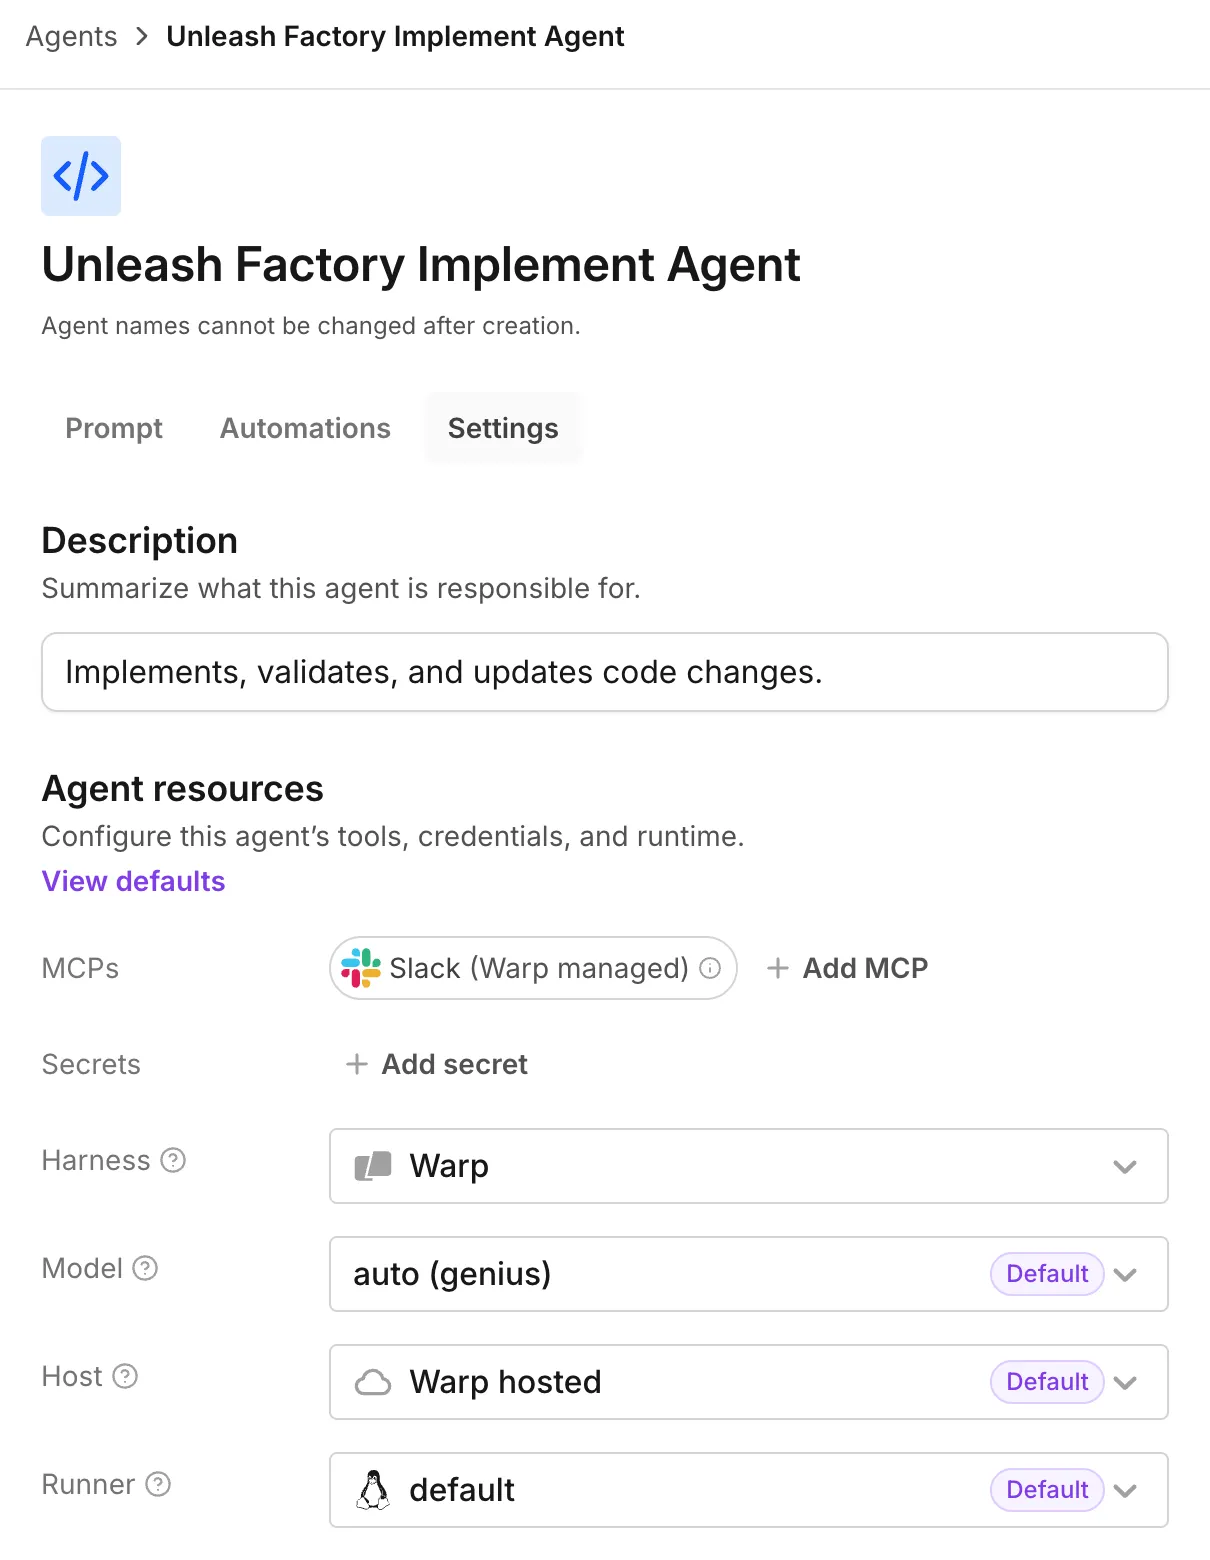
The Settings tab contains the agent’s description and resources. -
Edit the agent description, harness, model, runner, host, MCP servers, or secrets.
-
To change the agent’s instructions, click Prompt and edit the prompt.
-
In the top-right corner, click Save.
Choose models and harnesses per agent
Section titled “Choose models and harnesses per agent”Choose each agent’s model and harness in its settings. Supported harnesses include the Warp Agent, Claude Code, and Codex. A foreman using Claude Code or Codex can still dispatch other factory agents, whose runs are tracked as its children.
Third-party harnesses require a paid plan. On the Free plan, agents use the Warp Agent. See Warp pricing for plan details.
Default model IDs change over time, so choose based on what each agent has to do well:
| Agent | What to optimize for |
|---|---|
| Foreman | Orchestration, instruction following, and long-running conversations |
| Triage | Research, evidence gathering, and working with connected tools |
| Spec | Synthesizing requirements, technical reasoning, and precise writing |
| Implement | Coding strength, with a harness that fits your repositories and toolchain |
| Review | A different model or harness from the implement agent, so the two don’t share blind spots |
The model picker also includes custom routers from factories you can access. See Agent model choice, Custom routers, and Harnesses in the Automation Platform for available options.
Configuring a third-party harness
Section titled “Configuring a third-party harness”Change an agent’s harness to Claude Code or Codex to run it with that provider’s own coding tool.
-
In the web app sidebar, click your factory to expand it, then click Agents.
-
Click an agent to open its Settings tab.
-
In the “Harness” dropdown, choose Claude Code or Codex. The “Auth” field appears for these harnesses.
-
In the “Auth” field, choose a compatible, team-owned secret from the list or click New auth secret to create one.
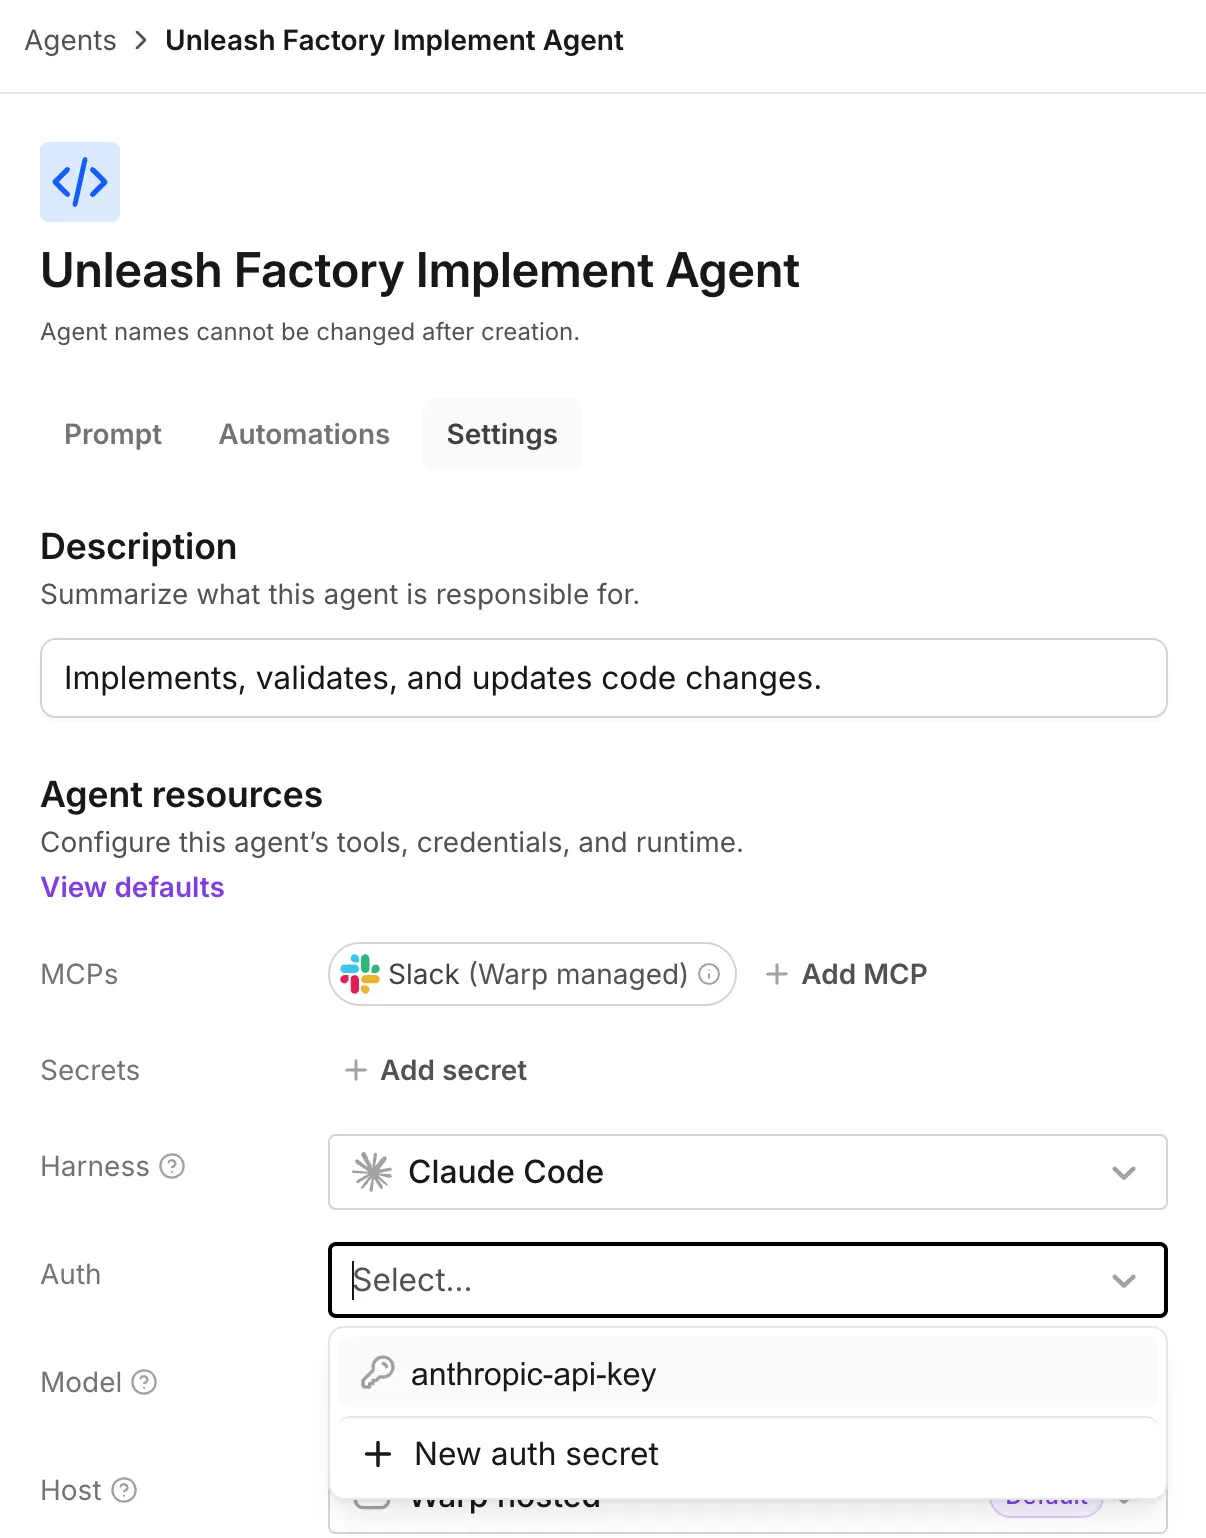
The Auth dropdown appears when a third-party harness is selected. -
In the “Model” dropdown, choose a model from that harness’s catalog.
-
In the top-right corner, click Save.
With a Warp-managed factory, you can edit harness, auth, and model from the dashboard. A GitHub-backed factory sets them through agentDefaults.harness or a per-agent harness override in the definition files. For an example, see 03-multi-harness.
Related pages
Section titled “Related pages”- About factory agents - Understand responsibilities and human decision points
- Creating custom agents
- Factory skills
- Definitions as code